Files structure
Files structure
- Documentation – folder contains the documentation to this work.
- PSD – folder contains graphic source (mockups) files of the work. They can be needed in case of redesign by other designer.
- Page Builder - Build your landing page in minutes.
- bootstrap - contains basic bootstrap items.
- css - contains custom css.
- elements - contains all template blocks.
- fonts - contains the fonts used in Databased.
- images - contains images used in Databased.
- js - contains the javascript files.
- tmp - contains temporary files.
- elements.json - contains the structure of the elements list.
- index.html - main file.
- iupload.php - the upload script.
- preview.php - the preview script.
- save.php - the script for exporting created markup.
Installation
Before Installing
To be able to use Page Builder, you must have the following:
- PHP
- Apache webserver (Windows servers will probably work, but are not supported)
- An FTP tool to upload the files
Installing the HTML Builder script is simply a matter uploading the script files to a server/hosting account.
It is very important to upload files to live server or local server. You should edit your website with the help of page builder only on local server or live server. If you do it by opening index.html file in browser, it will not allow you to make export of any changes.
In order to upload our template to live server, you need to upload the content of the folder "pagebuilder" to your server.
You can do it using FTP, FileZilla or hosting control panel.
Just drag and drop content of "pagebuilder" folder to your root folder on your server.
Performance of this operation means that you have the server space and the domain.

Then type your website name in browser and you will get page builder with a template.
HTML Structure
Page is based on latest version of the Bootstrap framework (3.X) and is fully compatible with it. HTML marking of the page consists from 2 the main parts, <Head> and <Body>.
In <Head> we connect all external files which we are necessary for our work of this page (css and by javascript), an also we determine specifications.
To <Body> be in the main content of the page (our blocks with functionality). Each block is marked by special comments at the beginning and at the end (this applies to both html and css files). The general structure <Body>:
                        block code here

                        block code here

                        block code here

                        ...


                        block code here

                        block code here
CSS Structure
Files contained in CSS folder of the Landing Page (and their short description):
- style.css – the main stylesheet. It responds for the appearance of your project.
- fonts.css – stylesheet of icons font.
- woo-style.css – styles for store.
- swipper.css - styles of swiper slider.
File style.css contains the main styles of your project, its code is structured in the following way:
                        /*=== [ General style ] =========================================================================================*/


                        /*=Title==================================================================================================================================================================*/

						...

						/*= About section ==================================================================================================================================================================*/
						Section styles

                       	...

                        /*=banner==========================================================================================================================================*/
If you want to change a certain section – just find it with the narrative and then change to the style you need (or delete unneeded styles for optimization).
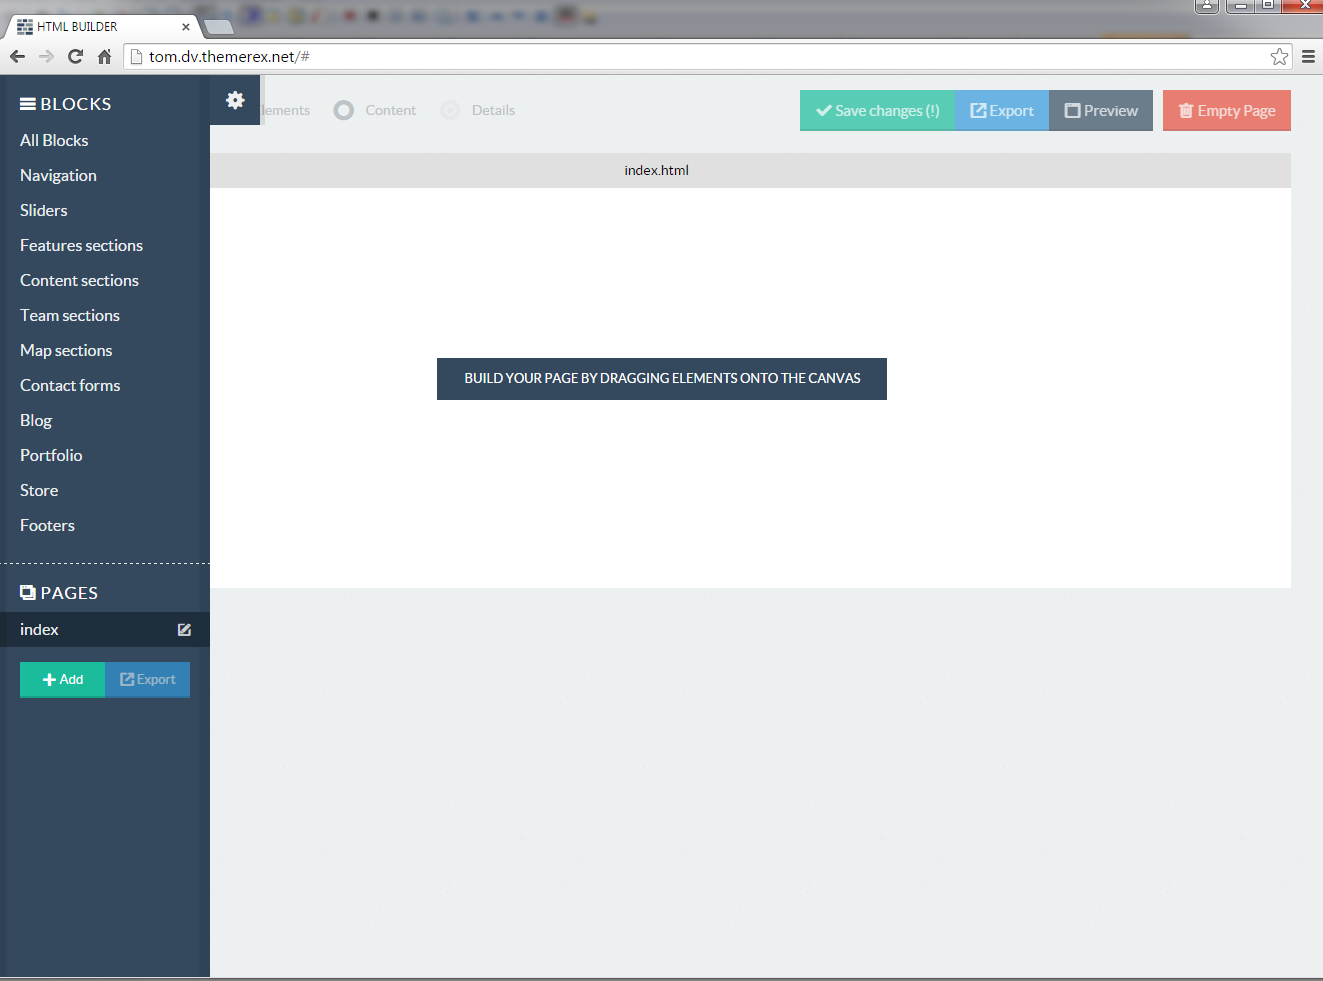
Page Builder
Introduction
What it is Page Builder is a Javascript script which allows publishers of HTML templates to provide their customers with a quick and easy way to customise HTML templates. Page Builder runs (almost) entirely in the browser. The only server side code is in the form of a single PHP file used for exporting HTML markup.
What it's not (!) Page Builder is NOT a CMS (content management system). It does not provide a way for end-users to work on live websites and make changes to such websites.
Upgrading
MAKE A BACKUP BEFORE UPDATING!!
Before updating, you should copy all the config data from your /js/builder.js (at the top of the file) as you'll need to enter this data into the updates builder.js file.
Next, simply replace all the files in the script folder except for the following items:
- /elements.json
- /elements/* (all files and folders inside your /elements folder)
Finally, place your config data back into the updated /js/builder.js file and you're all set.
Structure
HTML Builder is built using HTML, CSS Javascript and a single PHP file ("save.php", used for exporting created markup). It's built using the Flat UI pro interface kit (http://designmodo.com/flat)
The following folders are part of the Flat UI Pro kit:
- /bootstrap (contains basic bootstrap items)
- /css (contains custom css)
- /custom (contains less+css)
- /fonts (contains the fonts used in Databased)
- /images (contains images used in Databased)
- /js (contains the Flat UI Pro javascript files)
- /less (contains the original Flat UI Pro less files)
Configuration / Using builder with your own template
Even though the HTML Builder script comes with several HTML elements ready for usage, the goal of this script is allow you to use with your own HTML template and your own HTML elements
For your HTML template to be compatible with the HTML Builder script, it needs to meet the following requirements:
- The HTML template needs to have a modular structure, meaning it's composed of re-usable elements. Such elements can be headers, slideshows, blog posts, content sections, pricing tables, etc. Each of these elements must be a direct child of the templates page container element! For example, the main page container is a DIV element with id="page"; then each of your elements needs to be a direct child of this DIV container.
To setup your HTML template with HTML Builder, please follow the instructions below:
- Define your HTML elements. We suggest creating an additional folder (named "elements" for example) in which you should place your HTML files containing your HTML elements. Within the elements folder, you should also place your external resources such as stylesheets, Javascript files and images. Where you place these resources is basically up to you, as long as you make sure the HTML files within your elements folder can access these files.
- Each of your elements will be placed inside it's own HTML file. This means you'll need to create a separate HTML file for each element (!) Within these HTML files, you'll need to make sure you reference all external resources required for this HTML element to function properly; this could be external CSS files, JS file or images. We suggest you load each HTML file inside your browser to check and make sure it functions and looks correct. Please note that within each HTML file, your element must be a direct child of the same page container element (!)
- Edit /js/builder.js and enter the correct value for the variable "pageContainer" on line 3 of this file. This value should be a jQuery selector (to be save, we'd suggest using an ID select, for example "#page") pointing to your main page container.
-
Create/edit your HTML skeleton file (skeleton.html) and make sure it sits within your elements folder (as a direct child). This is the HTML file used to create the final HTML files by the export function. It's important that within this file, you link to all the proper external resources like stylesheets, javascript files, images, etc.
This HTML file will also need to contain the main page element discussed before, without any child elements! Also keep in mind that the skeleton.html file is referenced by the src attribute of the iframe around line 135 in index.html, if you change the name of the skeleton file, be sure to update the source attribute of this iframe as well.
- Once you have completed all of your HTML elements, the final step is to create a JSON file which contains all the element categories and URLs to the HTML elements file. For the correct structure of this JSON file, please take a close look at the provided file "elements.json". For each element you'll need to specify the height as well, this is important as it's used to calculate the correct height for the thumbnails as well as the blocks on the canvas.
-
Finally, you might need to configure the export file, "save.php". The two available variables for configuration are:
- $pathToAssets: this is an array containing all the folders within your elements folder which should be included in the exported ZIP. Please note that you only have to include those folders which are direct children of your elements folder. The export function will run through these folders and automatically include all files and folders found within the specified folders.
- $filename: this is name used for the final ZIP archive downloaded by the user.
Defining editable CSS attributes for HTML items
To keep track of your editable items, we've created an array in "builder.js" named editableItems. This multi-dimensional array contains jQuery compatible selectors and an for each selector an array of CSS attributes (please have a look at the original "builder.js" file for the correct syntax). When the script detects a color attribute ("color", "background-color", "border-color", etc) it will automatically activate the color picker.
By default, the script will show a regular text field for each CSS attribute (except colors like mentioned above). However, you can also configure a dropdown with a number of options to choose from. To achieve this, another Javascript array is used, named editableItemOptions. This array contains a combination of jQuery selector and CSS attributes as keys and an array with possible values as values. For the correct syntax to use, please have a look at the original "builder.js" file.
PLEASE NOTE: certain issues could arise when nesting editable tags; when clicking on an elements which has a parent container element which is also editable, that parent container will be the one selected. You might want to pay special attention to this when setting up your editable items! Since the script uses jQuery based selectors, you can always specify specific classes to prevent this from being a problem.
Configuring the upload script (/iupload.php)
To be able to upload images from the HTML Builder script, you'll need to set two variables in "/iupload.php". The first one, $uploads_dir specifies the folder in which uploaded files are stored (make sure this folder is writable!). The second variable $relative_path specified the relative path between your element files and the upload folder (this path is used to load the image in the HTML Builder interface after uploading a file).
Using element thumbnail images instead of live iframes
If you're using a large number of elements, using iframe for the live thumbnails can slow down your script. To provide a workable solution, as of version 1.5, HTML Builder can use images instead of iframes. This significantly speeds up the loading time of the script. To use images, simply add an additional value to the element's entry in your elements.json file. The name of this value should be "thumbnail" and it's value should be the path to the thumbnail image on your server.
Complex blocks
Special care will have to be given to complex blocks. This applies specifically to blocks that contain Javascript which modifies the HTML in that block. Examples of such scripts are slideshows (the popular jQuery NivoSlider for example). The problem with such scripts is that the modified HTML is rendered on the canvas and when the site is exported, the modified HTML is used rather then the original, un-modified HTML.
To counter this problem, we have created a solution which uses an additional (hidden) iframe for such blocks. These hidden iframes do not allow Javascript to be executed and therefor will always contain the un-modified HTML. When changes are made to the canvas, these changes applied to both the frame on the canvas as well as to the hidden frame with the original HTML.
To make this solution work properly, some additional configuration is required:
1. Unique IDs
Elements that are editable (and which appear in your "ediatbleItems" array as well as in your "editableContent" array) will need to be assigned a unique ID. This uqniue ID is used to synchonize changes between the frame on the canvas and the hidden frame. If an element does not have a unique ID set, syncing won't work.
2. Place the block's Javascript in a separate function
The Javascript responsible for handling the slideshows (or other Javascript which modifies the HTML of the block) should be placed in a separate function. This function can be called whenever you'd like (on document ready or window load, etc). For an example, please refer to the "slideshow1.html" block (just before the closing tag of the BODY element).
3. Add the "sandbox" attribute the elements.json file
To apply this solution to a block, you will need to add the 'sandbox="true"' element to the array in elements.json (for an example, please refer to the "slideshow1.html" block recently added to "elements.json").
4. Add the block's Javascript function to elements.json
The Javadcript function from item 2 now needs to be added to "elements.json" using the "loaderFunction" attribute (for an example, please refer to the slideshow1 block in elements.json)
How should these blocks be edited when on the canvas?
This really depends on the nature of your block. You can add elements such as images to the "editableItems" array as you would normally. However, this will only work if the elements added to "editableItems" are still visible AND clickable after being modified by the slideshow scripts. Some slideshows hide the original images and display images created by the script instead. If this is the case, you won't be able to to use the image editor to edit the images in the slideshow and you should use the HTML source code editor instead.
Getting these complex blocks setup properly might take some trial and error. If you require assistance or need some advice, please don't hesitate to contact us via http://chillyorange.com/basic-support/ as we're more then happy to help out!
Features
Drag and drop
Page Builder allows users to drag HTML elements onto a canvas and drop them where they'd like them to appear. Once dropped onto the canvas, the position can be changed by dragging and dropping as well. Elements can be delete individually or all elements on the current page can be deleted in one go.
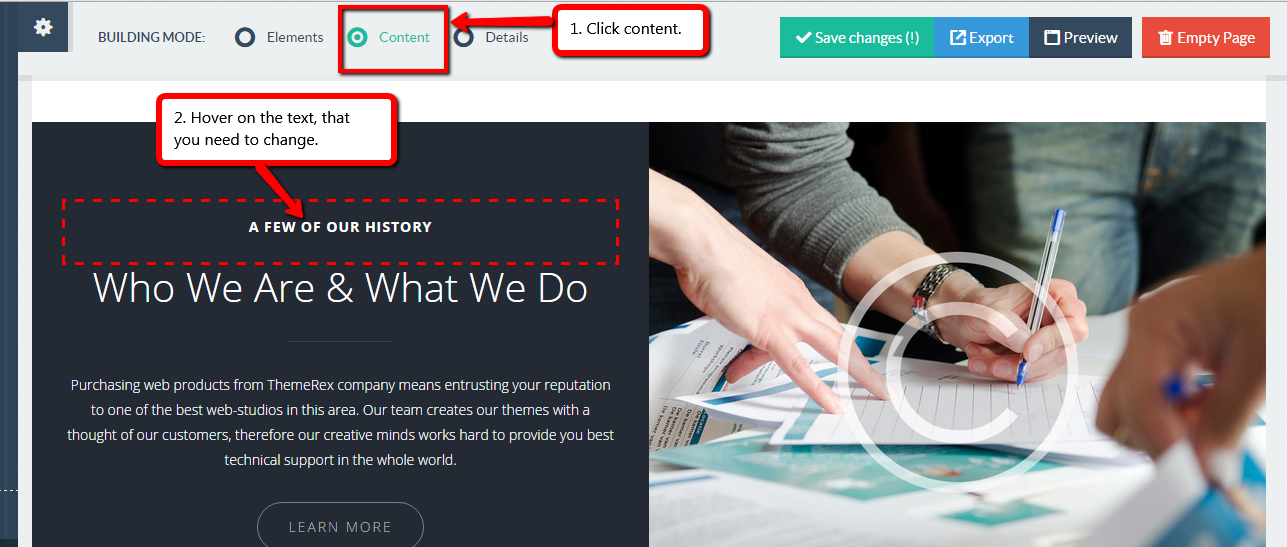
Content editing
The Page Builder script can also be used to edit written content inside each element (simply by setting the "building mode" to "content"). Page Builder uses a rich text editor, allowing to make changes to the written content. Depending on what type of element you're editing, certain options will be disabled in the editor. Editable text elements will need to be configured through "/js/builder.js", and depending on the exact configuration, certain text elements might not be editable.

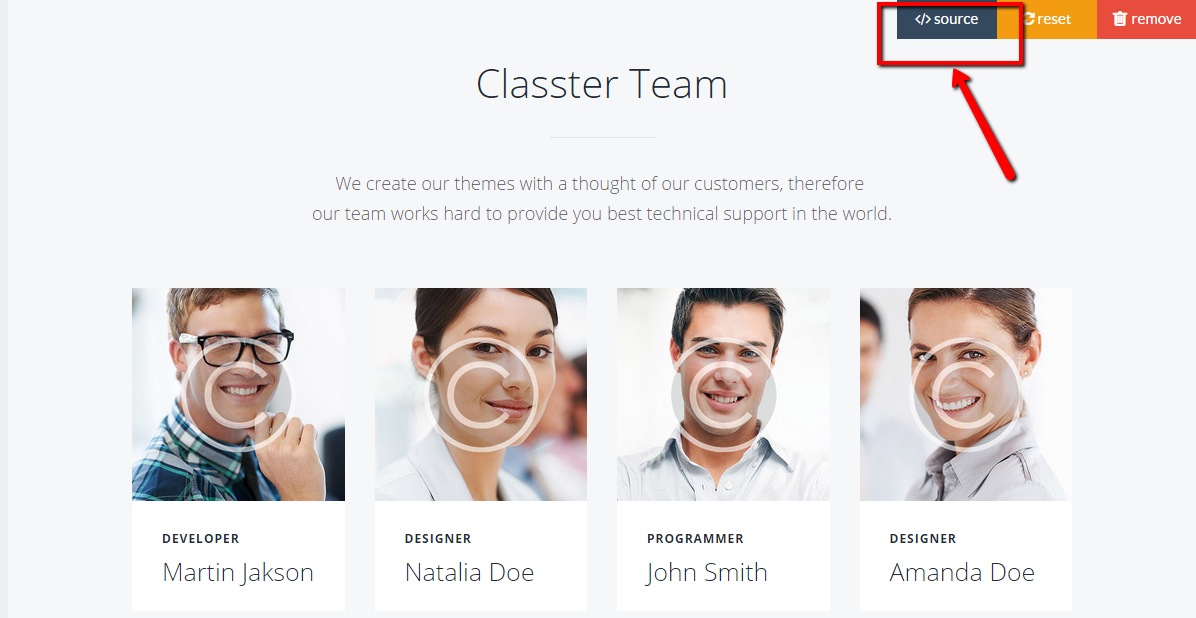
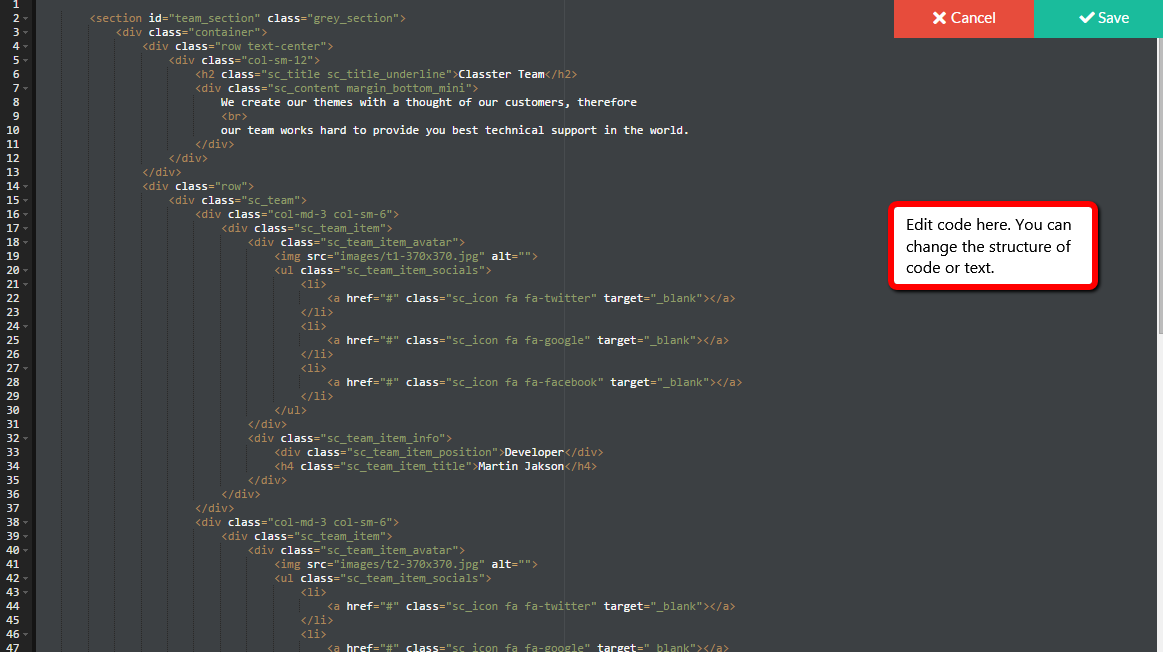
You can easily change section's code in PageBuilder. Use source code editor to do it.
Style/detail editing
The Page Builder script also allows for basic CSS editing and link editing. Using the built-in CSS editor, end-users can customise whatever CSS attributes the script's admin has configured. When editing a link, the end-user can point the link to either an internal page or an (external) URL.
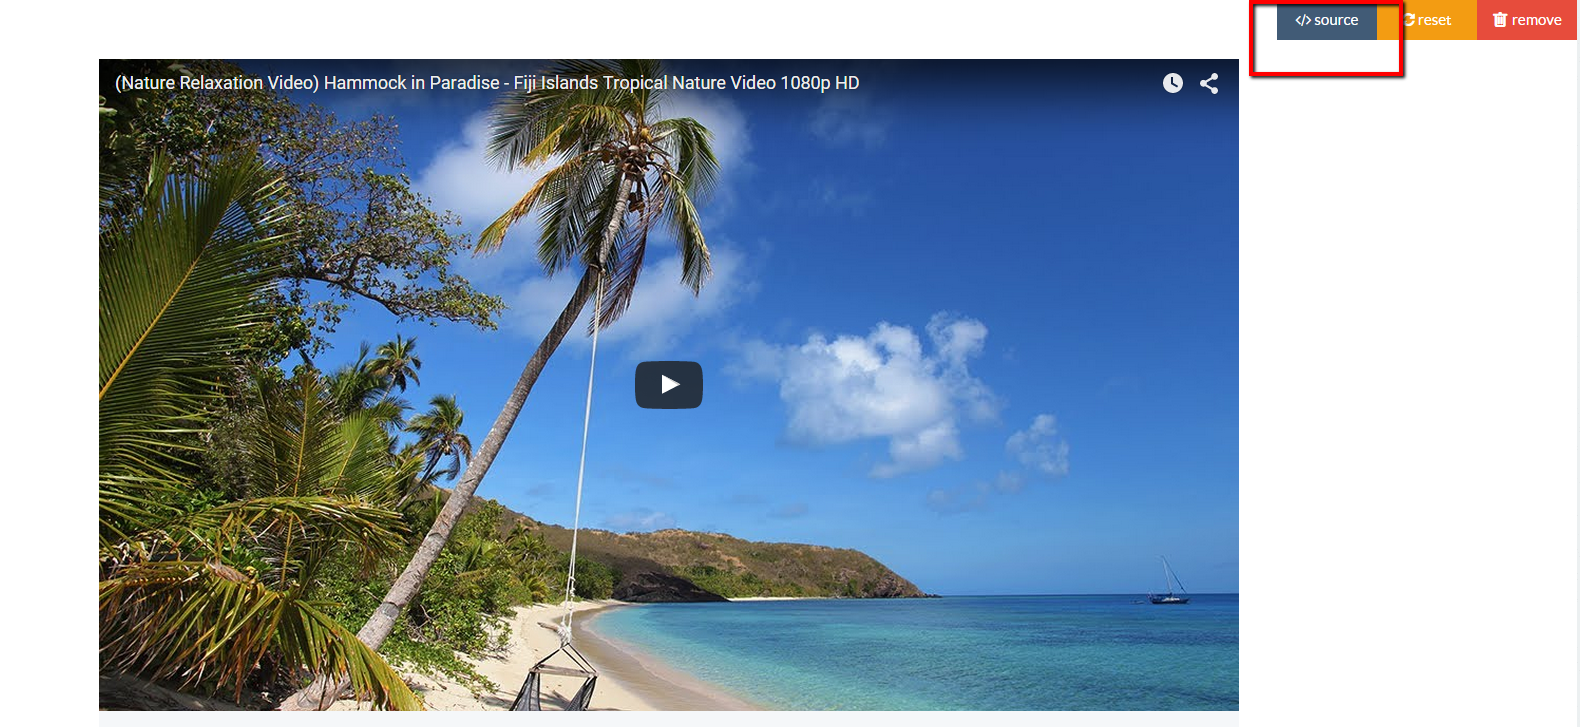
Video editing
Page Builder allows users to edit Youtube and Vimeo videos as well. To edit a video, click elements, then source code button and replace video frame with your own.
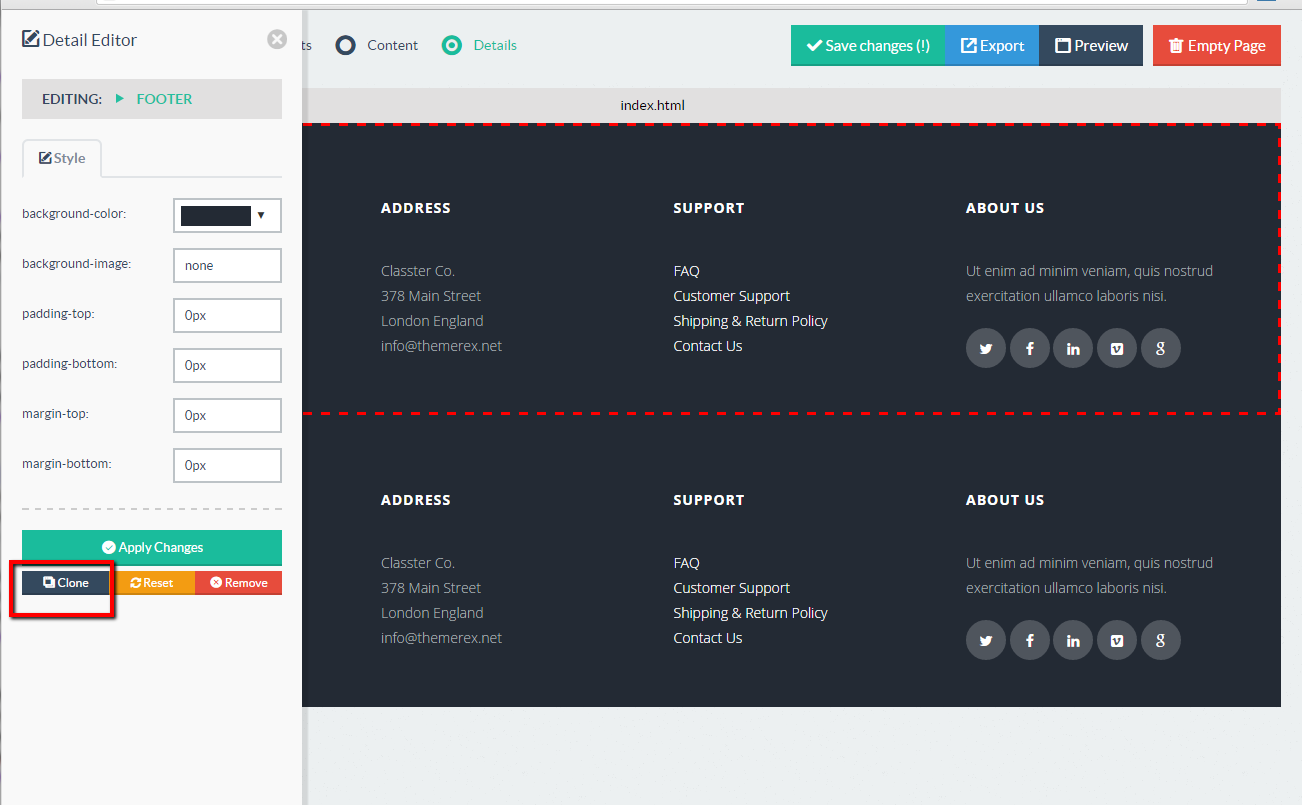
Cloning items
Items which have been setup in the "editableItems" array in /js/builder.js can be cloned. Switch to "Details" building mode, select the item which you want to clone and finally click the clone button from the left panel. Please note that cloned items will be inserted into the canvas right next to the original item.
In some situations, you might want to have the parent of the original item cloned, rather then the item itself. Consider the example of an unsorted list with "a" tags inside "li" tags. In this case, it's the containing "li" element which should be cloned, not the "a" element itself. To make this happen, make sure to add the class name "propClone" to the parent element in your element's .html file.
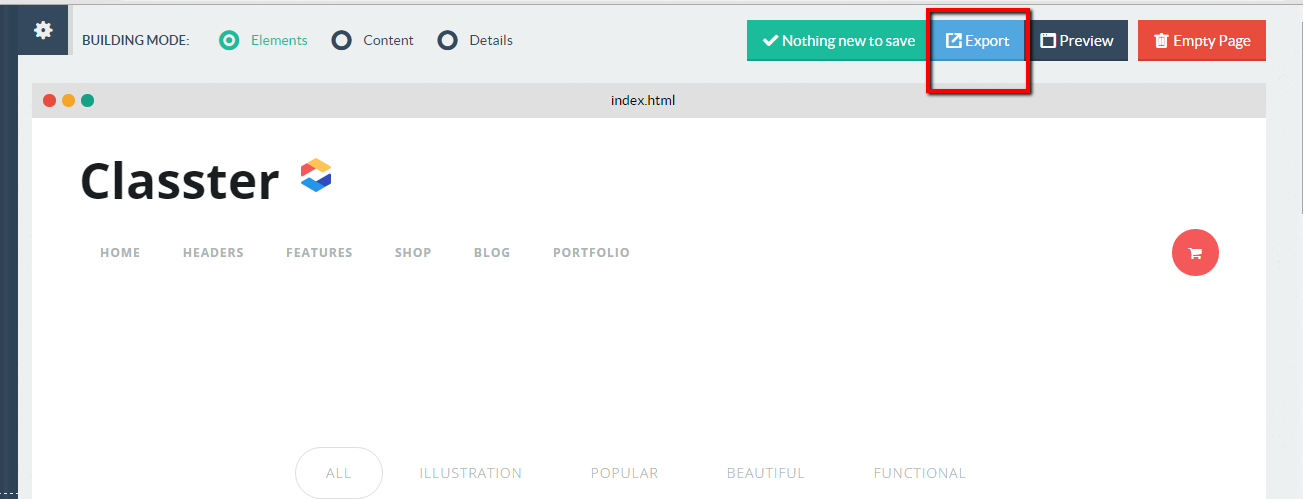
Export HTML
Whenever the user is happy with the final result, the created markup can be exported by click the blue export button. The export feature will grab all the used HTML elements for each created page and inserts these elements into a copy of the HTML skeleton file. Once all pages are completed, all the HTML files are bundled into a ZIP archive together with the other external resources like stylesheets, Javascript files and images (as configured through the "save.php" file) which will be downloaded by the end user.
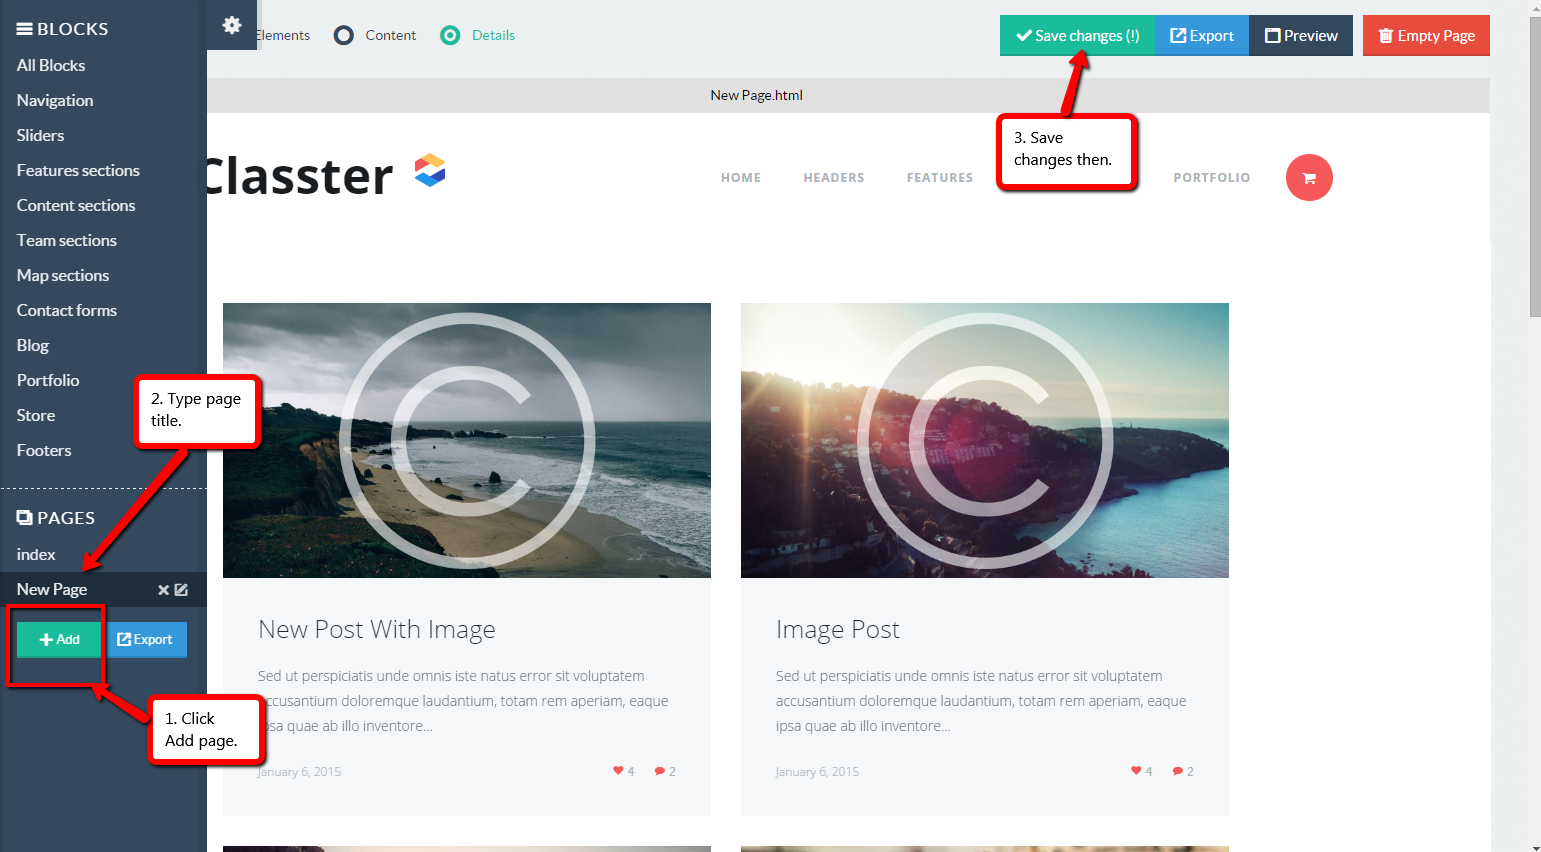
Pages
The Page Builder script allows users to create multiple pages at once. To add a new page, simply click the green button labeled "+ Add" just below the current pages list. You can alter the page names as well (please use names with the .html extension, these are added automatically during the export). When exporting the markup, the pages will use the same names. To delete a page, simply click the little delete icon next to the page you'd like to delete.

Upgrading
MAKE A BACKUP BEFORE UPDATING!!
New version brings a lot of changes, so I advise you to simply install the builder again.
But if you want, for whatever reason, keep the previous one - use chatlog list below.
Replace modified files:
- index.html
- save.php
- elements.json
- css/style.css
- elements/*.*
- js/builder.js
How to create a page
There is an opportunity in pagebuilder to add new page. You can put the name of this page and assign this page to your menu. There is an example.
After the page has been created, you need to export this one. Then assign this page to your menu or some specific button.
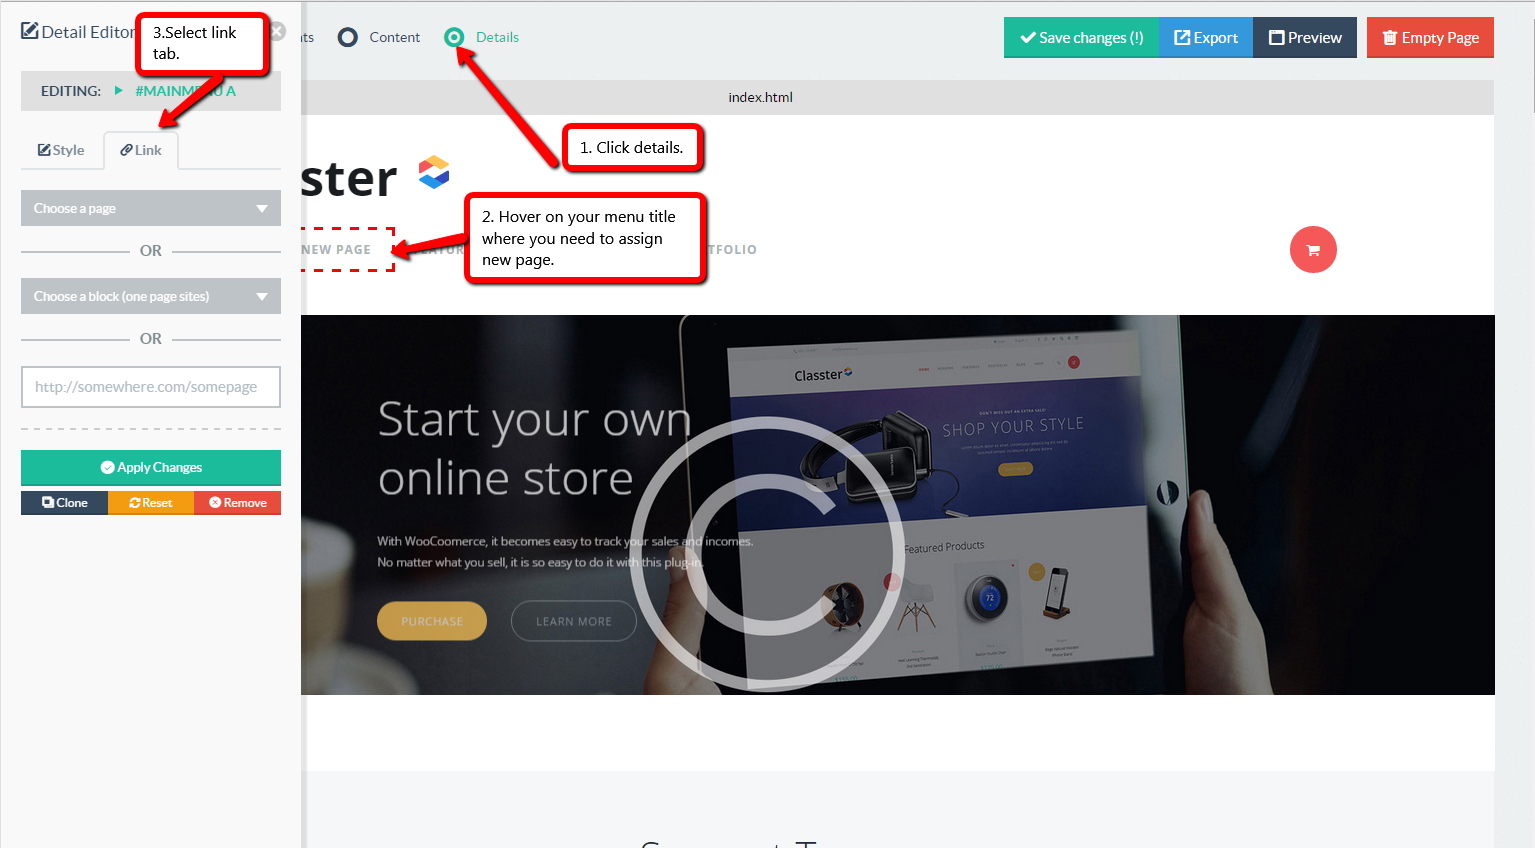
As you see, there is an opportunity to select the page, in order to assign this menu.
Customizations
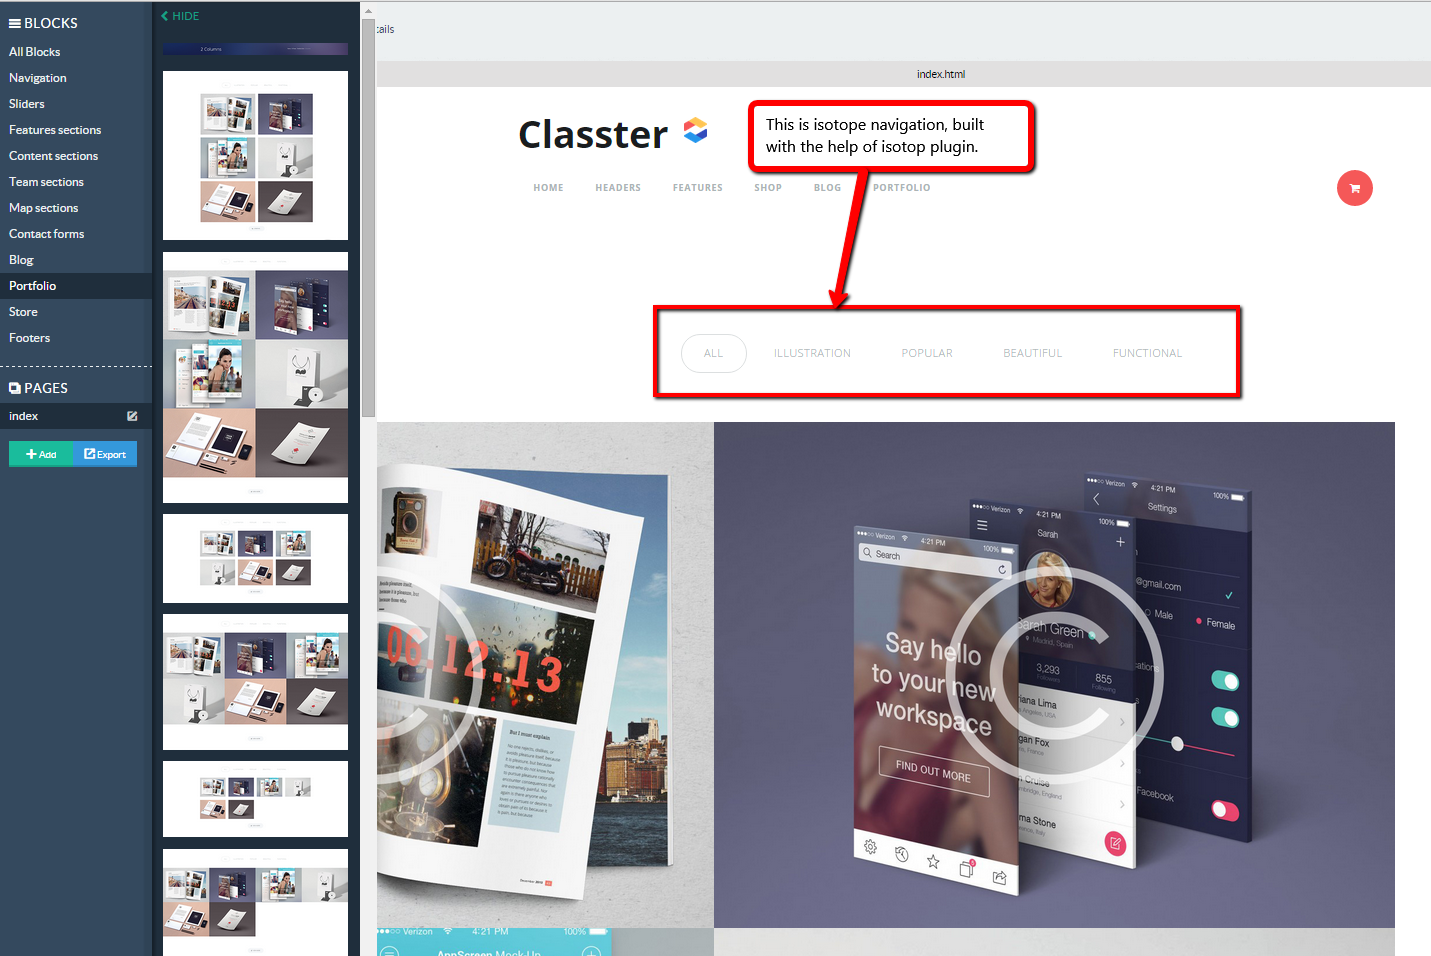
Portfolio edit
If you need to add portfolio to your website, you can navigate to block - portfolio and select the one you need.
There are 12 layouts of portfolio you can chose. Portfolio has sort function. Sort function is made with the help of isotop plugin (jquery.isotope.min.js file).
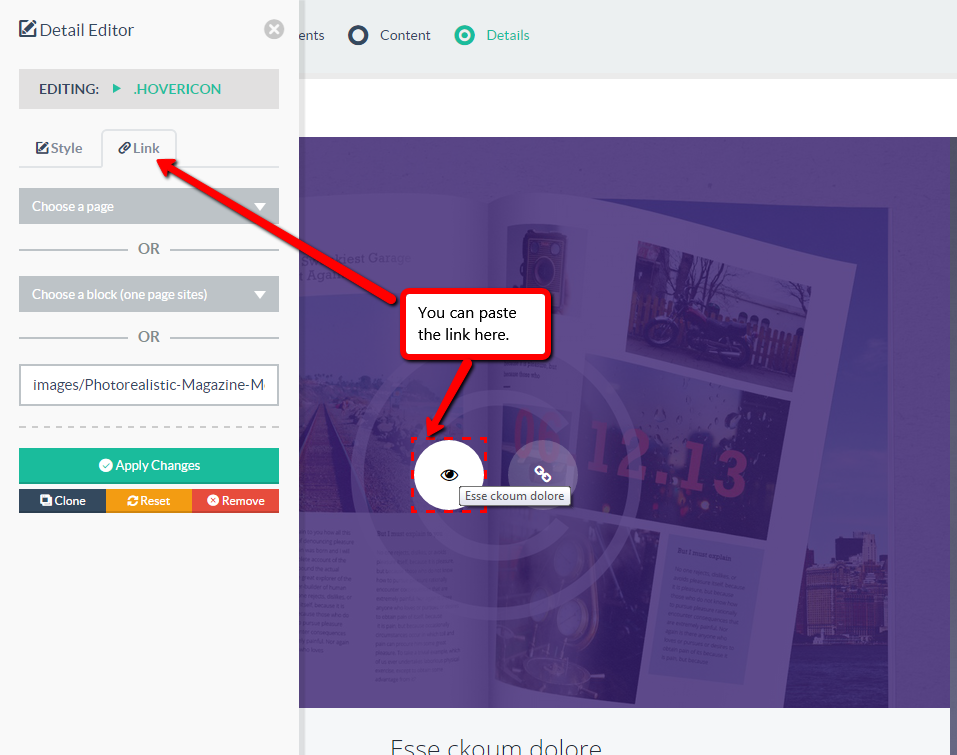
If you need to change image, open source code and look for the following code:
Here you can replace image with the one you need. If you need to add extra image, just copy this code, replace image and filter number (flt_46 flt_9 ).
Hover on image you will need to change in css files. You can change link also.
There is a view more button at the end of portfolio. You can insert either link or add new page.
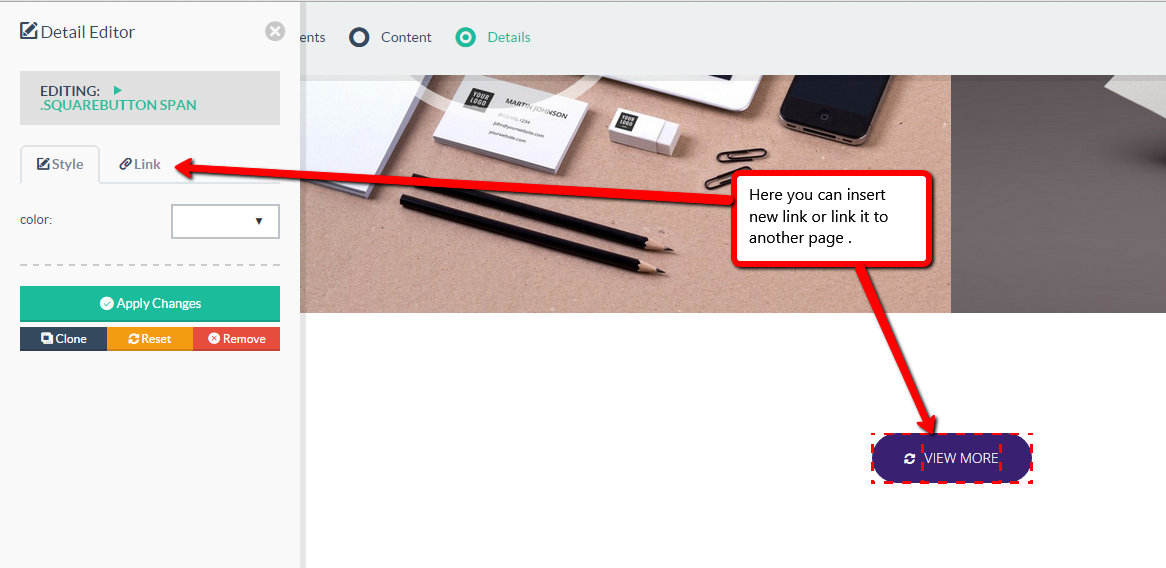
Hover of this button is better to change in css files.
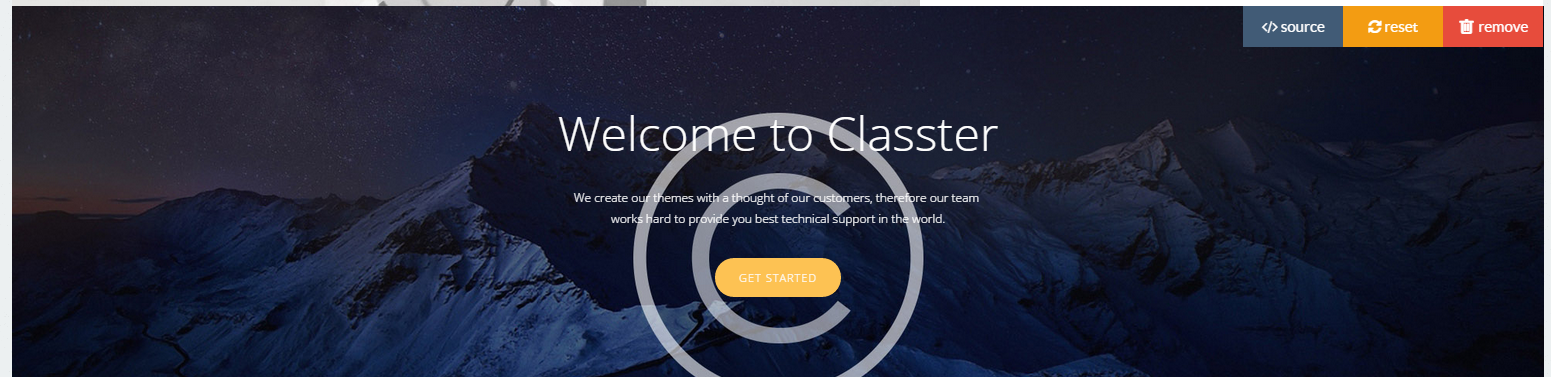
Slider edit
There are two kind of blocks for slider.
Slider is built with the help of flexislider plugin.
Image you can change in source code. There is a code for first slider block.
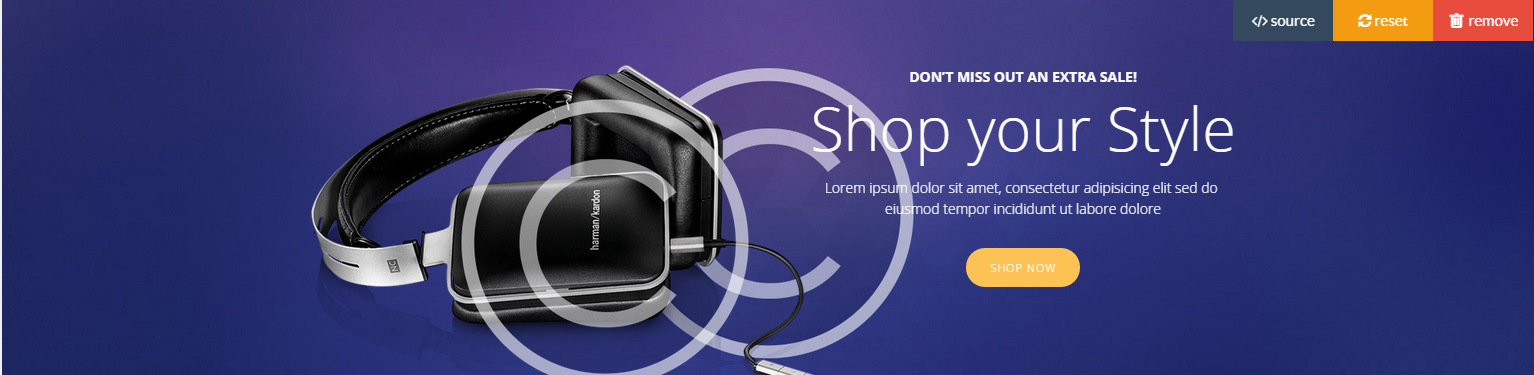
If you need to add extra image, just copy this code.
For second slider block you should edit this code:
Google map edit
There is a block with google map. You can see it here:
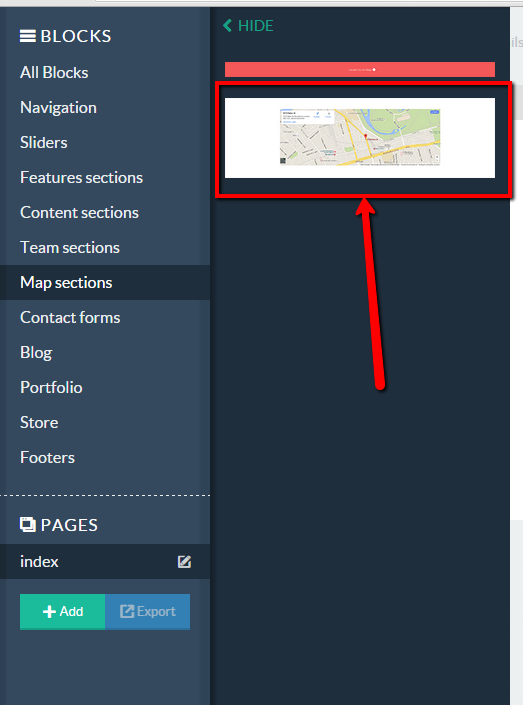
If you need to change location, open source code. Here you will see the following code:
You will need to replace this line with your own google map embed code.

In order to get embed code of your location, enter google map, using this link https://maps.google.com Paste your address here. Then click menu button and select share and embed code. There is screenshot:
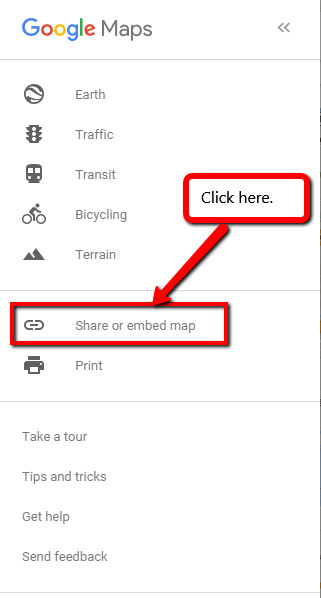
Paste the code that you have got instead of the code that is written above.
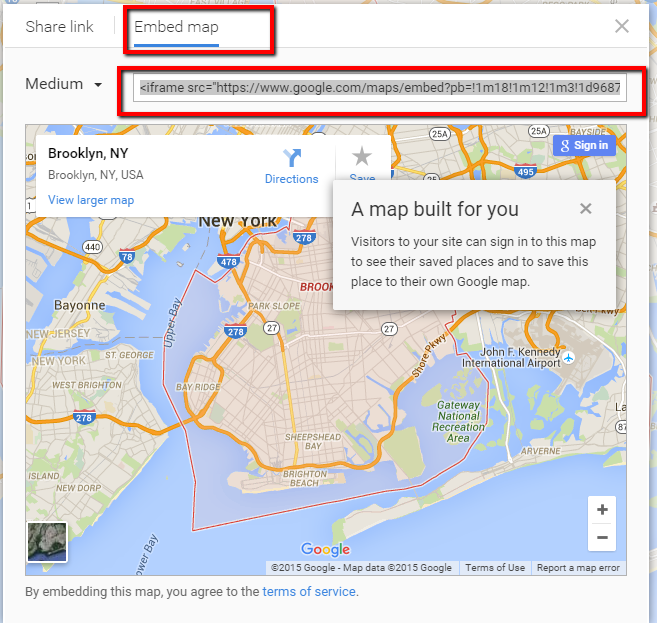
Save changes then.
Contact form edit
There are two examples of contact forms you can find in blocks: Contact forms.
If you need to change text, open source code and edit text here.
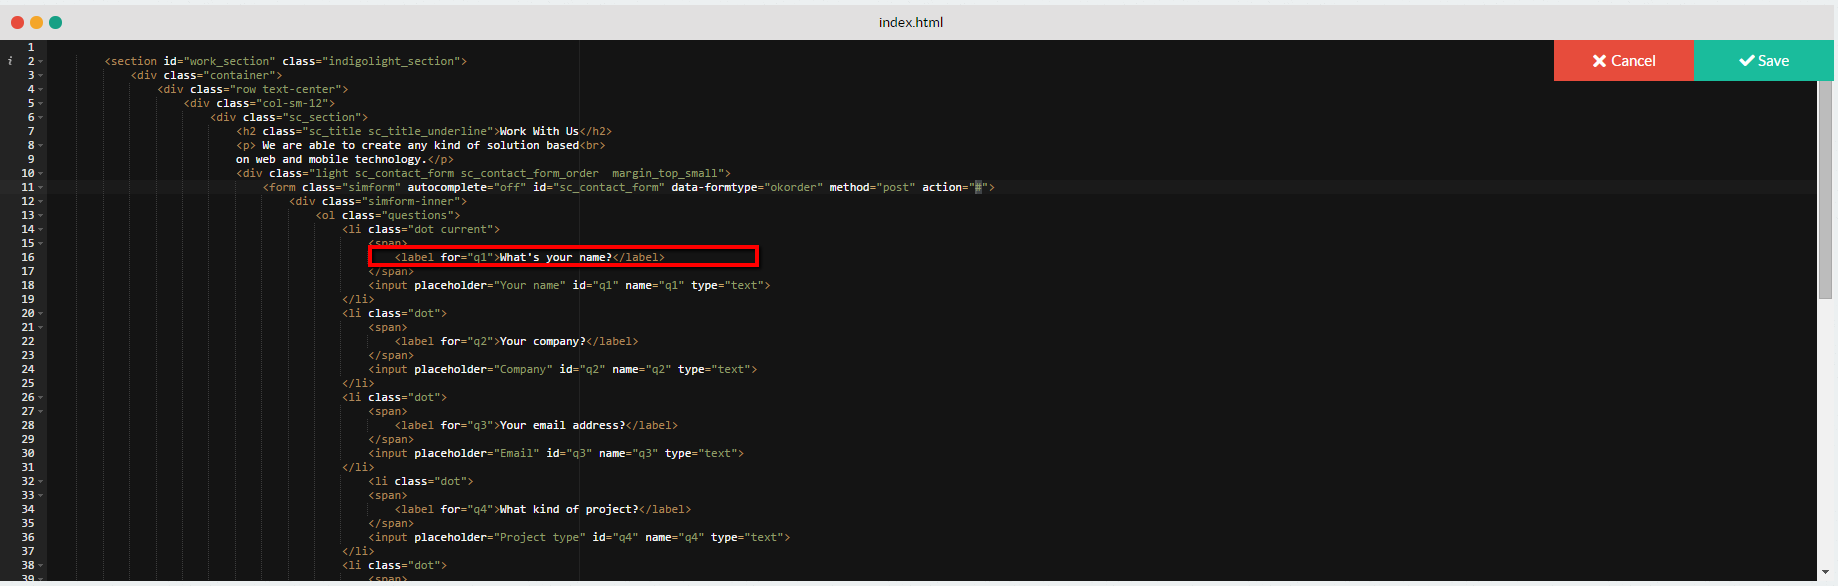
For the first contact form, in order to activate this one, replace in the following file: elements/js/contact-form.php line 7 $your_email = 'your@email.com'; with your own email.
For the second contact form, in order to activate this one, replace in the following file: elements/js/contact-form2.php line 7 $your_email = 'your@email.com'; with your own email.
How to change icons
You can change icons, using page builder. For example you need to change shopping cart on menu.
Hover on this icon, check details. Then in drop down panel, from the left, select icon tab and change icons here.
Also you can select styles for you icon: color, font-size, weight, font-family. You can apply link that you need in link tab.
How to change image.
The Page Builder script allows user to edit images as well. To be able to edit images, firstly the image selectors will need to be added to the "editableItems" array in the /js/builder.js file. To edit images on the canvas, firstly select the Details building mode, this will allow you to select images. When selected, an "image" tab will be visible in the left panel, allowing you to either upload an image or enter a URL manually.
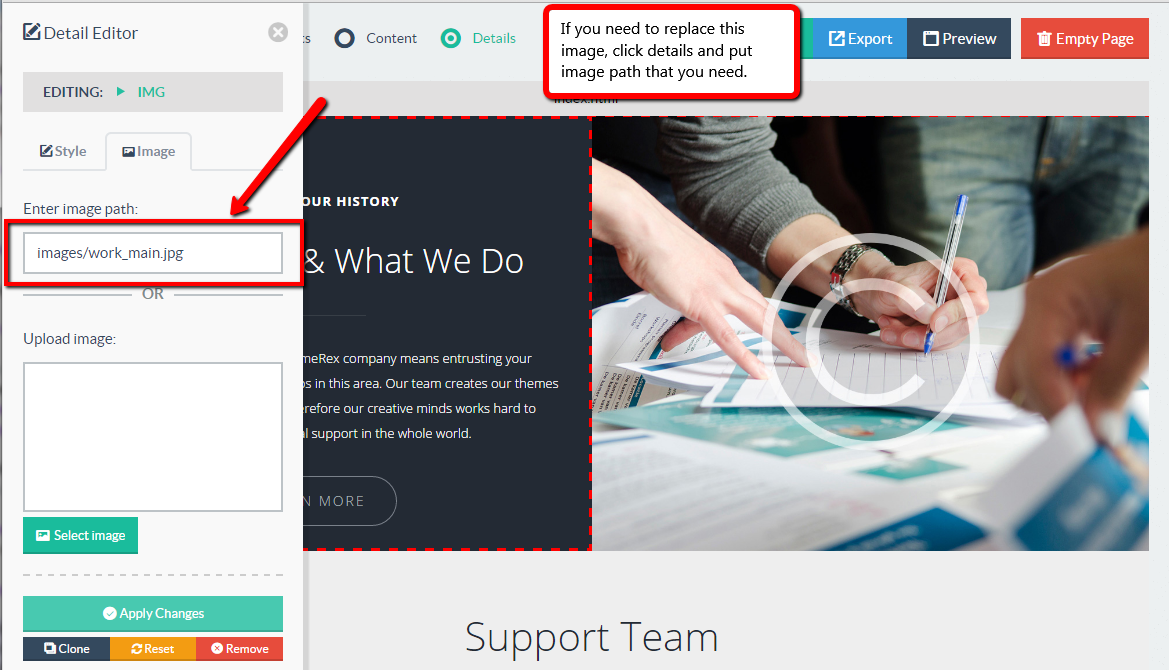
But if you have hover on image (for example team section), you will need to change image in code source.

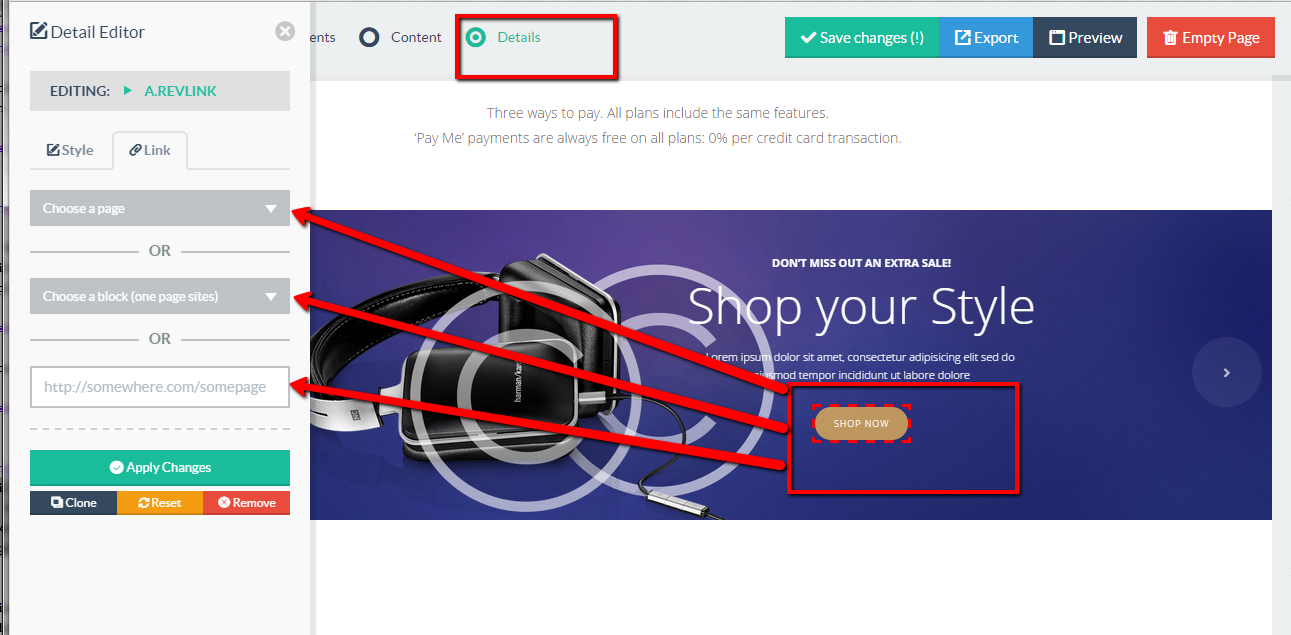
How to insert link
Link editing
The Page Builder script allows user to edit links as well. To be able to edit links, firstly the link selectors will need to be added to the "editableItems" array in the /js/builder.js file. To edit links on the canvas, firstly select the Details building mode, this will allow you to select links. When selected, a "link" tab will be visible in the left panel, allowing you to either choose a page to link to or enter a URL manually.
Linking within a single page.
When building a one-page website, you might want to link to sections within a single page rather then to a separate page. To do this, simply edit the link and use the second dropdown to choose the block you'd like to link to. The ID's to which can be linked, have to be configured within the block HTML files, and the ID attribute should be assigned to the first child element of the main container (for an example, please have a look at any of the bundled block files).
Store section.
Store section includes 12 examples of the store.
There are some of them:
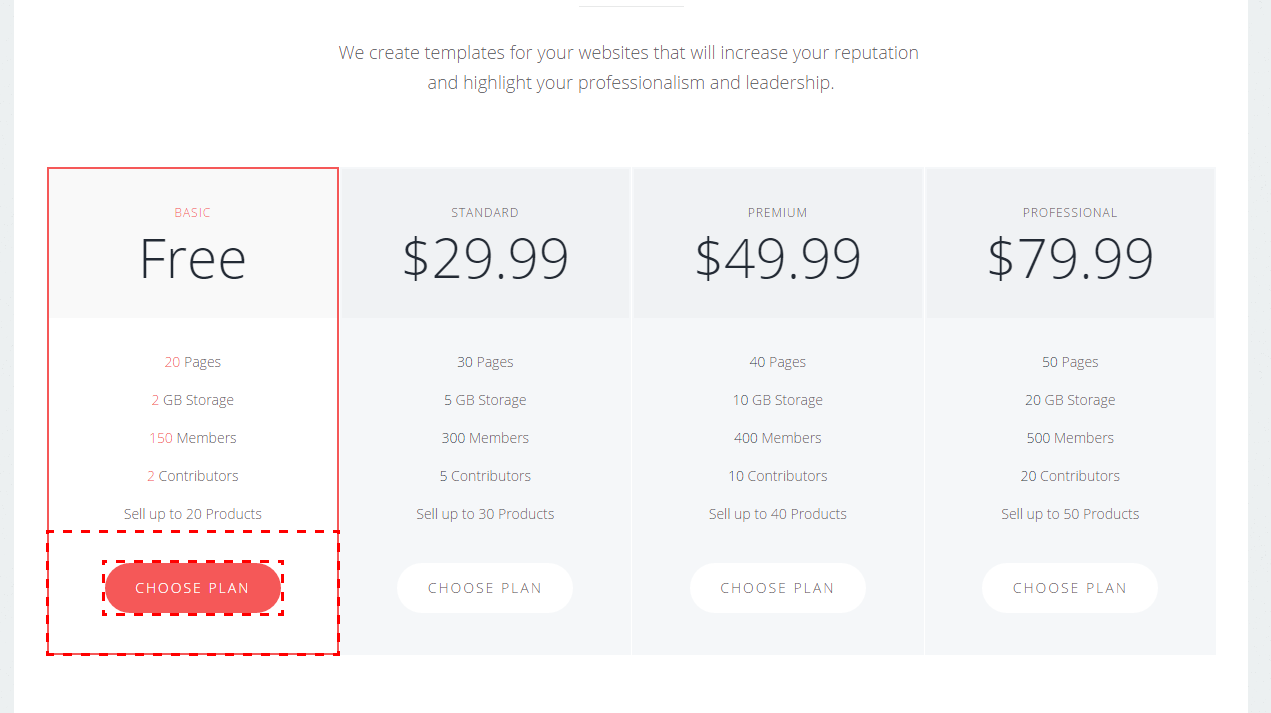
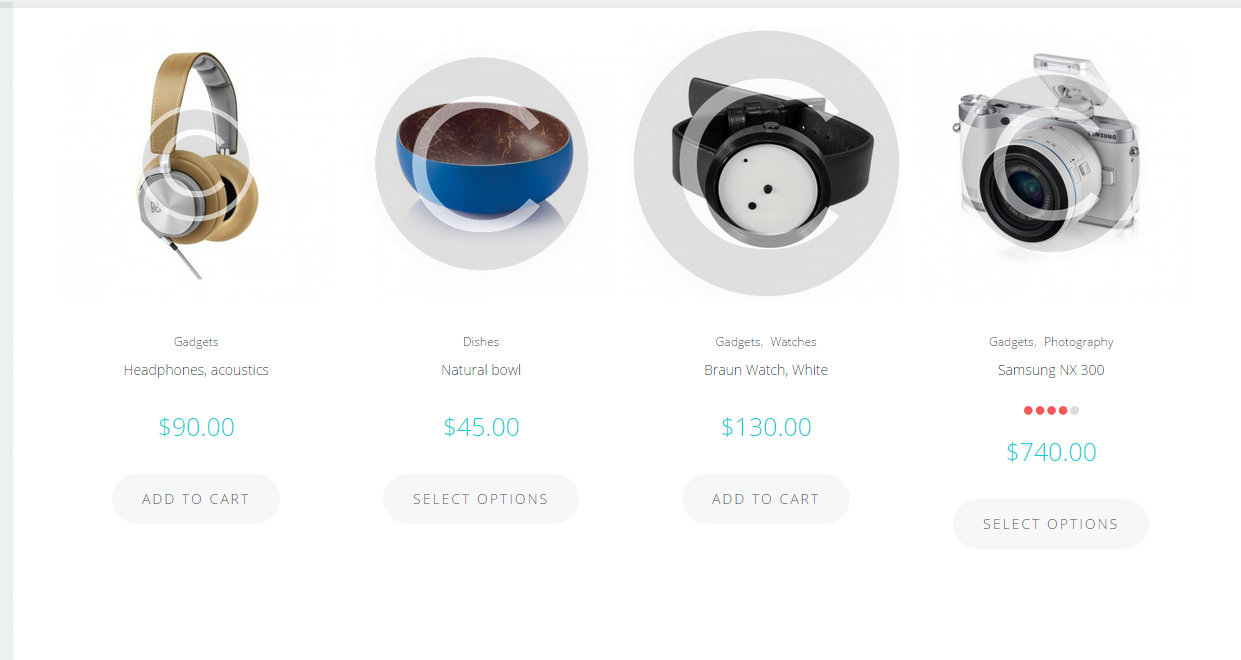
Unfortunately, theme does not contain store functionality. There are only examples of the stores you can implement. If you need this functionality, you need to use additional php coding and scripts.
Navbar.
In order to change the navigation bar type you need to open index.html code and find navigation section (tag <nav>).
Using classes you can change the type of navbar (see types below).
Fixed top navbar.
To make navigation fixed to the top you need to add the following classes: "navbar-fixed-top" (example below).
<!-- NAVIGATION -->
<nav class="navbar bg-color1 dark-bg navbar-fixed-top">
Sliding on scroll navbar.
To make navigation sliding on scroll you need to add the following classes: "navbar-fixed-top navbar-slide" (example below).
<!-- NAVIGATION -->
<nav class="navbar bg-color1 dark-bg navbar-fixed-top navbar-slide">
Transparent navbar.
To make navigation transparent you need to add the following classes: "navbar-fixed-top navbar-slide navbar-transparent" (example below).
<!-- NAVIGATION -->
<nav class="navbar bg-color1 dark-bg navbar-fixed-top navbar-slide navbar-transparent">
Logotype.
In order to add your logo, you need to open index.html file code, find the code you see below and change default data to yours.
Or just change the logo image in a folder with pictures (the picture size must be identical, if it is not – change the size in index.html page code).
<!-- NAVIGATION -->
<nav class="navbar bg-color1 dark-bg navbar-fixed-top navbar-slide navbar-transparent">
	<div class="container"> <a class="navbar-brand goto" href="#"><img src="./images/logo.png" height="25" alt="Your logo"></a>
Mobile Menu Toggle Button.
If you want to change the type of toggle button, you need to open html file, find a button code (look below) and add or dele class "round-toggle".
<!-- NAVIGATION -->
	<nav class="navbar navbar-fixed-top navbar-slide">
		<div class="container">
			<a class="navbar-brand goto" href="#"><img src="./images/logo.png" alt="Your logo" height="30" width="30" /></a>
			<button class="round-toggle navbar-toggle menu-collapse-btn collapsed" data-toggle="collapse" data-target=".navMenuCollapse"> <span class="icon-bar"></span> <span class="icon-bar"></span> <span class="icon-bar"></span> </button>
			<div class="collapse navbar-collapse navMenuCollapse">
Video background: settings.
If you want to change the settings of video background, you need to open custom.js file, find a background code (look below) and change the settings you need.
//------------------------------------------------------------------------
//						VIDEO BACKGROUND SETTINGS
//------------------------------------------------------------------------
	$(function() {
    	var BV = new $.BigVideo({container: $('.block-video-bg'), useFlashForFirefox:false});
    	BV.init();
		if(navigator.userAgent.match(/iPhone|iPad|iPod|Android|BlackBerry|IEMobile/i)) {
                BV.show('images/video_gag.jpg');
        } else{
			if (!!window.opera || navigator.userAgent.indexOf(' OPR/') >= 0) {
				BV.show('video_bg.ogv', {doLoop:true, ambient:true});
			} else{
				BV.show('video_bg.mp4', {doLoop:true, ambient:true, altSource:'video_bg.ogv'});
			}
			BV.getPlayer().on('loadedmetadata', function(){
   	 			$('#big-video-wrap video').fadeIn('slow');
			});
		}
	});
also you can play a series of ambient background videos
$(function() {
    var BV = new $.BigVideo();
    BV.init();
    BV.show(['vid1.mp4','vid2.mp4','vid3.mp4'],{ambient:true});
});
Css file editing.
We advice to make some changes in style.css files or another css styles exactly.
For example if you need to change hover, you can use inspect element in Chrome browser or Firebug plugin in Mozila Firefox. It will show you the file where you need to make changes.
There is an example.
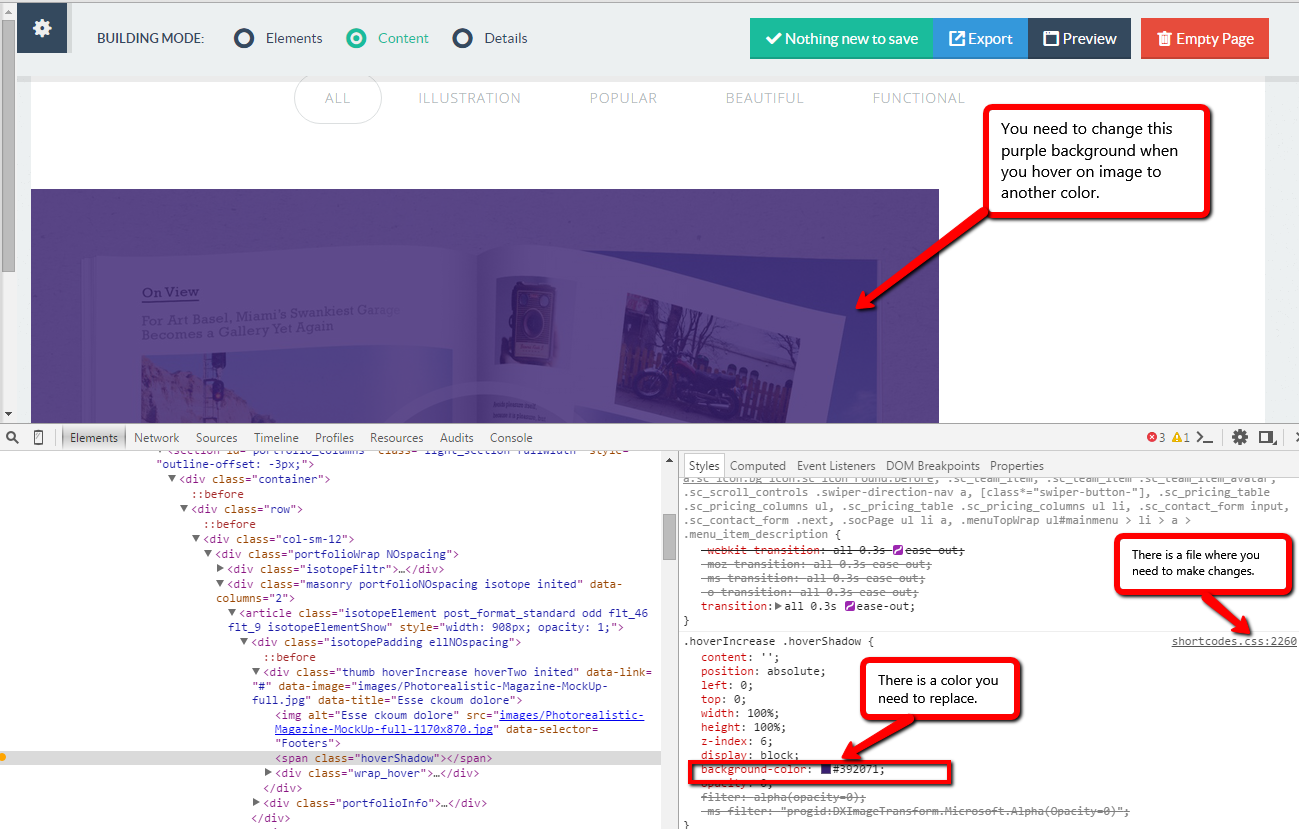
Within css styles, you can add any css attributes that you need: opacity, shadow, borders.., any feature that you can not manage by page builder.
For example you need to change distance between menu. But there is no such opportunity to make it by page builder. You can manage it with css styles.
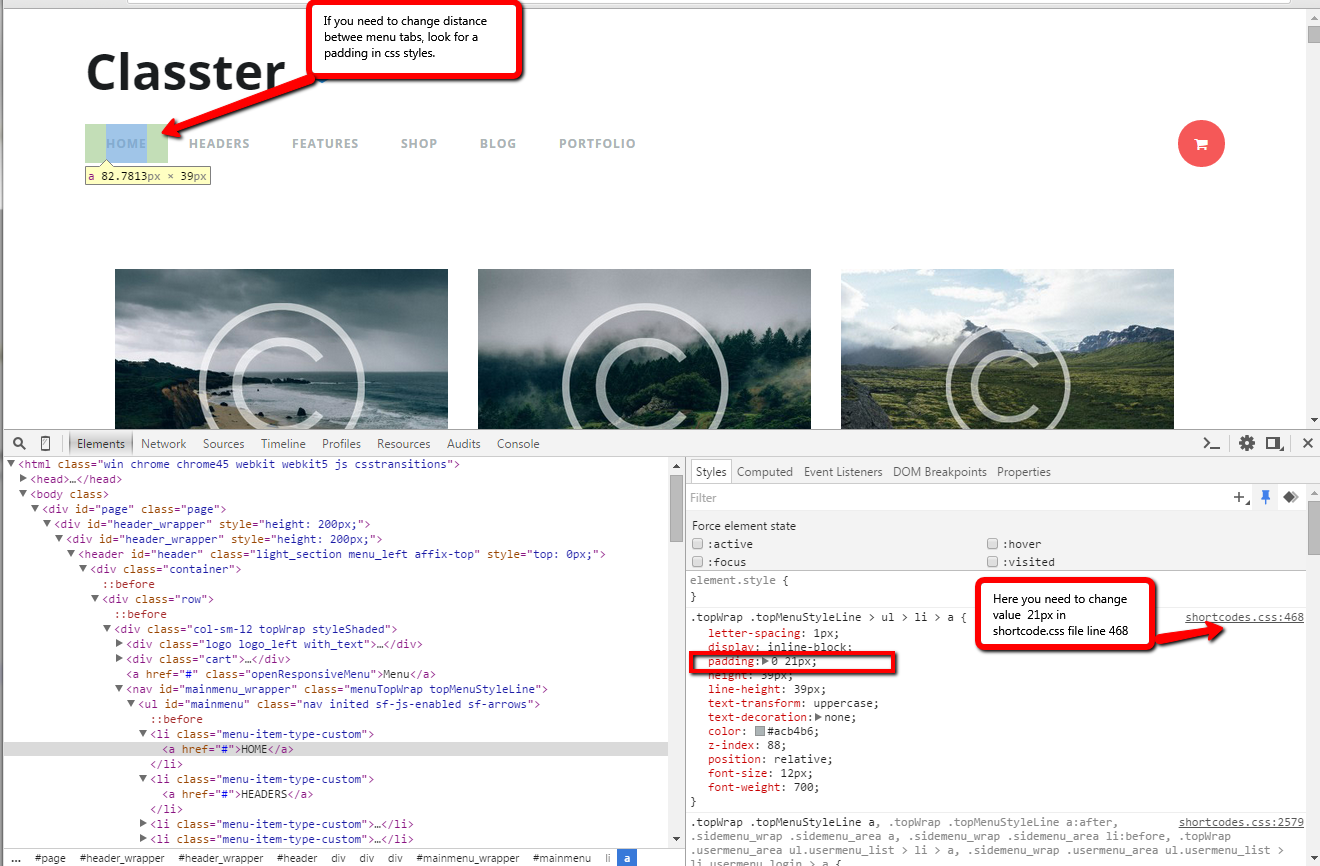
More information about the work of inspect element tool you can find here:
https://www.youtube.com/watch?v=cnWL2d9bGPk